UFPS Getting started
First, like any other integration, make sure to enable the UFPS integration in the integrations window.
Step 1
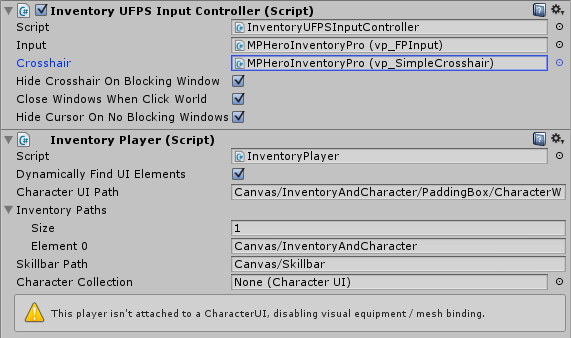
First, select your player and add the following components to it:
- InventoryUFPSInputController – Binds the UFPS Input and Inventory Pro’s UI.
- Make sure you assign the Input field
- Make sure you assign the Crosshair
- InventoryPlayer – Defines the Inventory Pro player.
- Select Dynamically Find UI Elements
- Set the path to the Character UI Path, Inventories and Skillbar.
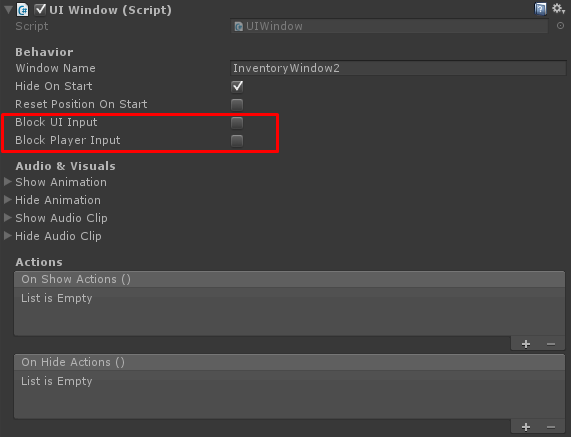
Step 2 - UIWindows
All UIWindow's have the option to block user input and UI input.
UI Input: Blocks other input and only allows input on this window (currently only used for controller support)
User input: Blocks the player controller
When the window becomes invisible the UFPS input will be restored.
Choose carefully which windows should block UFPS input, for example the InfoBox ( tooltip ) shouldn't block the input, as it can be shown while maintaining the input. The Inventory however should (likely) block input while visible.